 UConnect Navigation Board Installation
NavBoard Replacement . . its easier to replace your RHB Navigation Board than to replace your RHB System.
![]()
Greg in Georgia said
"The navigation board was just delivered. I already had my system
out, so it only took a few minutes to install
and it works great. Thank You."
Troubleshooting . . If your system is stuck on Acquiring Satellites after you install the Navigation Board, it means the coaxial antenna cable is not securely snapped into its connector on top of the board.
Instructions
|
Removing your RHB unit from your vehicle (10-20 minutes) Return to Navigation Board Page Removing the dashboard trim surrounding your RHB unit is unique for each vehicle so it may help to have some instruction to identify the boundaries of the removable trim. See Radio Removal Videos. The videos will usually apply to few vehicle model years. If your dashboard has a glossy or metallic finish that could be scratched while you disconnect the cables from the head, tape a dish towel or similar to your dashboard just under the radio. Be Aware, all of the connectors on the back of your system have a release latch that must be depressed before the connector can be pulled out. It requires a lot of hand-strength to remove some of the connectors. If necessary, use a small screw driver or knife point to pry a little on each end of a connector while depressing the latch. Replacing the Navigation Board (10 minutes) Remove the top cover with 2 screws

Turn a small blade screw driver in the slot shown to unlatch the top cover 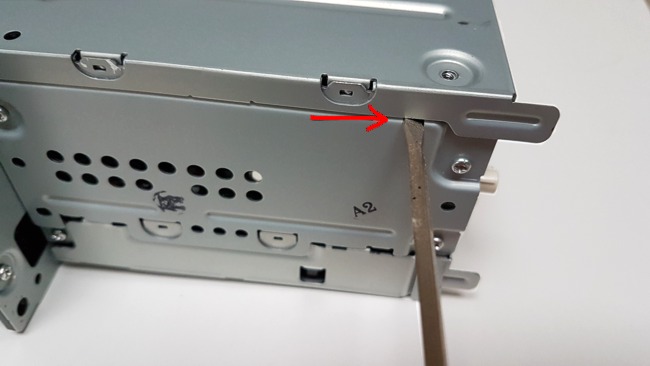
Remove the CD drive with 4 screws But first, see next photo to protect your ribbon cables 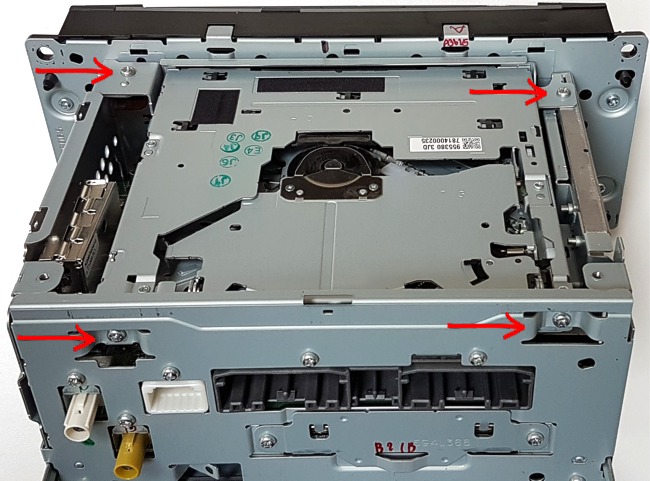
Caution - Don't stress the ribbon cable or its connections 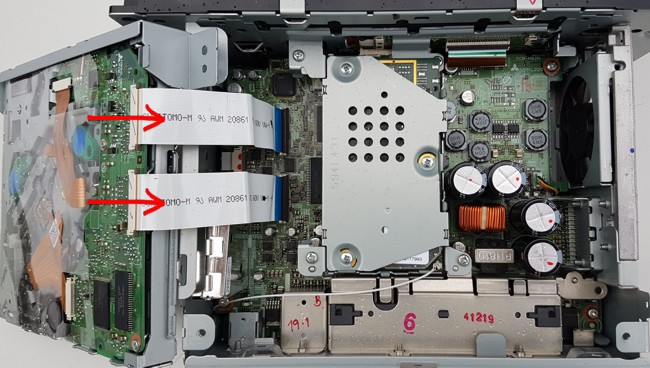
Use finger tips to pull up (un-snap)
antenna connector from the Navigation Board.
Don't pull on the wire 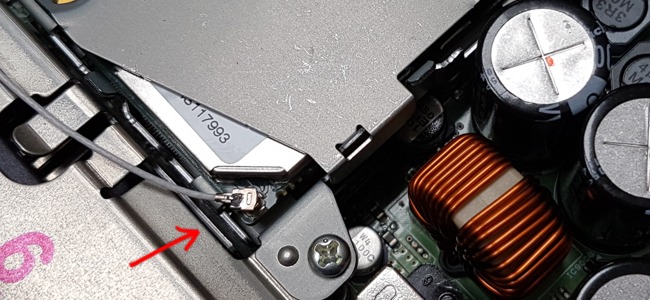
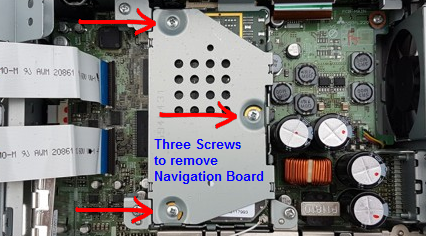
Remove the Navigation Board and its metal shield with 3 screws 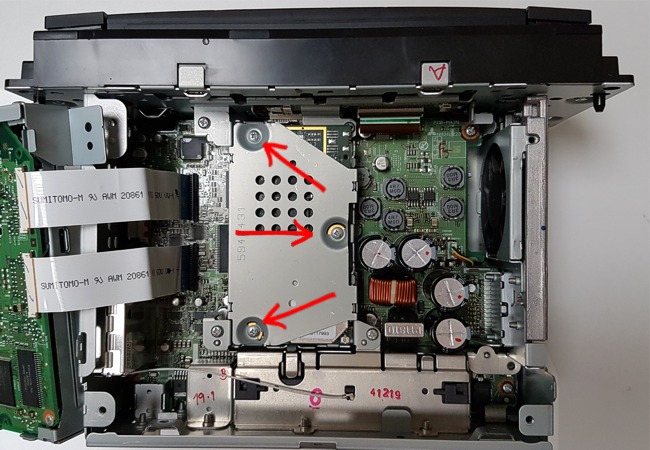
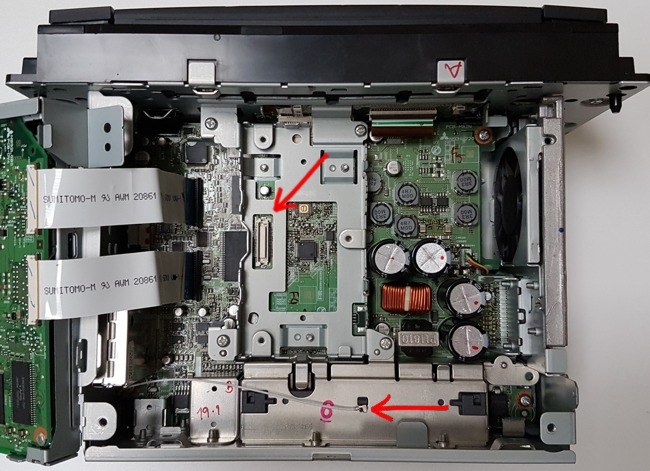
You are now ready to seat the replacement Navigation Board with its two connections to the Main Board.
|